Showing posts with label Fruit. Show all posts

Wednesday, April 4, 2012

Classic Pound Cake


With the beginning of Spring and my first dinner party of the season, I knew I wanted bright colors, fresh flavors, and few ingredients to adorn my table. I really wanted to embrace that new, fresh, colorful feeling of Spring; and the dessert I wanted to serve was no exception. It was the one course on the menu I had left to plan, and the first thing that came to mind was fruit; leaving unlimited possibilities.

Classic Pound Cake by lulu's dish

Seeing as I am an official believer that dessert is the closing to any meal and that it cannot be any less impressive than the meal itself, I refused to let it be just a last minute detail. If anything, the dessert should surpass the appetizer and main course; after all, it will be the last thing your guests eat. You want your guests to leave full, happy and still talking about how amazing the dessert was while your closing the door behind them.
The fact of the matter is, a simple dessert can leave this great positive impression. The dessert does not have to be complicated and take hours to construct. Simply having the ingredients speak for themselves is a great way to showcase any plate (even dessert), and this is what 'The Classic Pound Cake' is able to accomplish for you. It is buttery, dense and rich, but the bursts of fruit flavor are still able to pop. Fresh fruit is really the star of this dish and each bite is unique.

Ingredients:

  • 1 1⁄2 cups all-purpose flour
  • 1⁄4 tsp. baking soda
  • 1⁄4 tsp. salt
  • 1 1/2 sticks unsalted butter,
      at room temperature
  • 1 cup sugar
  • 1 1⁄2 tsp. vanilla extract
  • 2 eggs, at room temperature
  • 1⁄2 cup sour cream, at room temperature

Directions:

1. Preheat the oven to 325 degrees. 


2. Lightly grease and flour standard (8 1⁄2-by-4 1⁄2) inch loaf pan.


3. In a medium bowl, whisk together the dry ingredients of flour, baking soda and salt just until blended. 


4. In the bowl of an electric mixer, beat together the butter, sugar, and vanilla on medium speed until light and fluffy. 


5. Add the eggs one at a time to the wet ingredients, beating well after each addition until just blended. 


6. Add half of the flour mixture over the wet mixture and stir until both are they are just incorporated. 


7. Then, stir in the sour cream.


8. Then, add the remaining half of the flour mixture and stir until combined. 


9. Pour the batter into the prepared pan and tap gently on the counter to even out and settle the ingredients. 


10. Bake until a toothpick inserted into the center comes out clean for about 70 minutes. The cooking time will be slightly longer if using a metal pan. 


11. Remove from oven placing the pan on a wire rack. Let cool for 15 minutes.


12. Run a knife around the inside of the pan, invert the cake onto the rack and slowly slide the cake out of the pan. 


13. Let cake continue to cool on rack until room temperature, slice and serve. Dust with powder sugar and top with blueberries and raspberries and lemon zest. Depending upon thickness of slice it will yield 8 to 10 servings.

Wednesday, October 5, 2011

Raspberry Tiramisu Shooters


Let me start by saying... these are A-maaa-zing! Simply said, they taste as great as they look. This twist on traditional tiramisu is sweet, refreshing, and satisying. These little shooter size desserts are perfect for parties, entertaining, and (of course!) portion control (not that having just one is even an option!).


Ingredients:
Ladyfingers
2 tablespoons butter
3/4 cup plus 2 tablespoons flour
4 egg yolks
1/2 cup granulated sugar
4 egg whites, beaten until stiff
Pinch of salt
1 teaspoon vanilla extract
powdered sugar (for dusting)

Tiramisu

3 tablespoons seedless raspberry jam
1 tablespoon orange juice
1 (3-oz.) package cream cheese, softened to room temperature
1/4 cup sugar
1/2 cup heavy cream
8 ladyfingers (use the shot glass to make perfect circles)
Garnish: fresh mint sprigs and lemon zest
1 oz shot glasses, makes 8


Directions:
Ladyfingers

1. Preheat the oven to 350 degrees.


2. Using 2 tablespoons of butter to grease 2 baking sheets and then dust with 2 tablespoons of flour.


3. Mark parallel lines in the flour across the width of the tray about 4 inches apart.


4. Using a stand mixer fitted with a wire whisk beat the eggs and sugar on medium-high speed until the mixture is pale yellow, thick, and has tripled in volume (about 8 minutes).


5. Fold the egg whites, remaining 3/4 cup flour, salt and vanilla until mixture is smooth.


6. Now using a large pastry bag with a 3/4-inch plain tube with the mixture pipe fingers about 4 1/2-inches in length on to the baking sheet (using the lines as a guide).


7. Lightly dust the ladyfingers with powdered sugar.


8. Bake for 15 to 18 minutes, or until just firm on the outside and still soft in the center.


9. Cool until room temperature.

Tiramisu
1. Microwave raspberry jam in a small microwave-safe bowl for 20 seconds. Add OJ and stir until combined.

2. Beat cream cheese and sugar at medium speed with an electric mixer until creamy (about 1 minute).

3. Beat heavy cream with an electric mixer until soft peaks form. Fold into cream cheese mixture. Spoon into a zip-top plastic bag. (Do not seal.) Snip 1 corner of bag with scissors to make a hole (about 1/2 inch in diameter).

4. Cut ladyfingers by turning a shot upside down and pressing into ladyfinger. This will allow you to make perfect layers.

5. Push ladyfinger circle into bottom of 1 shot glass. Repeat procedure with 7 more shot glasses. Drizzle about 1/2 tsp. raspberry mixture into each glass. Pipe a small amount of cream cheese mixture evenly into each glass.

6.Repeat procedure with remaining ladyfingers, raspberry mixture, and cream cheese mixture. Top each glass with mint and lemon zest.

7.Cover and chill for a minimum of 2 hours.


(Adapted from Southern Living.)


Tuesday, October 4, 2011

Banana Crunch Muffins

I am beginning to realize that I may have a banana addiction. Is this possible? Okay maybe not, but I do admit I (at the very least) have the distinct inability to determine how many bananas will be consumed in one week by my son. I mean let's be honest here, I should easily have the exact number of bananas ingrained in my head. Have you seen how many banana recipes are already posted on here?! So maybe the real issue is simply that I intentionally over-buy bananas so that I will merely have an excuse to hide out in the kitchen and test out new recipes.


So this morning when I sat flipping through Ina's cookbook while sipping on coffee, I stumbled upon this muffin recipe. As I did, I looked at the bananas in the middle of the table and concluded that this simply must be a sign.  Who was I to argue, I had to make them. I mean ripe bananas heading for the trash and a new way to use them up. But the question remained, would I really like the crunchy and moist combination? Granola in a muffin? I knew I had to change a few things since 1. I hate walnuts (cannot elaborate that enough) and 2. I am a granola snob (I admit it), but the thought of granola inside the muffin left me curious...curious enough I had to test the idea out immediately! I knew I would instantly love or hate these muffins...and the testing began.

(Adapted from Ina Garten's Barefoot Contessa Cookbook...barely)


Ingredients:
3 cups flour
2 cups sugar
2 teaspoons baking powder
1 teaspoons baking soda
1/2 teaspoon salt
1/2 teaspoon ground cinnamon
1/4 teaspoon ground nutmeg
1/2 pound unsalted butter, melted and cooled
2 extra large eggs, room temperature
3/4 cup milk
3 teaspoons good vanilla extract
1 cup mashed ripe bananas (about 2 bananas)
1 cup medium diced ripe banana (about 1 banana)
**the more ripe the bananas the better the overall flavor will be**
1/2 cup whole raw almonds, pulse in food processor about 60 seconds
1 cup french vanilla almond granola, Cascadian Farms brand (make sure to break up large chunks by hand)
1 cup shredded coconut


Directions:
1. Preheat oven to 350 degrees.


2. Line with paper liners 18 large muffin cups. This MUST be done or the muffins will fall apart. They are extremely moist and will not remove from the tins easily!


3. Sift together flour, sugar, baking powder, baking soda, salt, cinnamon, and nutmeg.


4. Using a paddle attachment of an electric mixer, add the melted butter until blended.


5. Combine eggs, milk, vanilla, mashed bananas.


6. Add mixture to the flour and butter mixture.


7. Blend well but do NOT over mix.


8. Remove bowl from stand mixer.


9. Fold in remaining ingredients into batter.


10. Spoon batter into muffin tins until level with top. Batter will be extremely thick and lumpy.


11. Bake for 25-30 minutes or until golden brown and toothpick comes out clean.


12. Cool slightly then remove from pan and continue to cool on rack until room temperature.


And it was love! Despite my questioning the granola being baked directly inside of the muffin, it just works. It literally blends right in. You do obviously have some crunch, but it is not offensive or out of place. It simply adds texture and depth which is a nice change from just your basic everyday muffin recipe. This muffin stands up well on its own, but I am not going to lie that a cream cheese icing or glaze could easily adorn it and I would have absolutely no complaints!

Monday, September 12, 2011

Banana Coconut Bundt Cake

The story of my life...bananas well past ripe, sadly sitting in the fruit basket on the counter, and the thought running through my head, "I did it again this week!". How do I always over-buy bananas? How many dishes can you actually successfully use bananas in? Is my subconscious just looking for an excuse to bake? While all rhetorical questions, I could answer them all without pause. (My son. Thousands. YES!) If you are looking for something to impress the ladies coming over 'to brunch', need something a little different for your family (which will make a statement--impressive!), or simply looking for a way to salvage those bananas that are on the edge of the leaping into the trash, this recipe will withstand even the harshest critics. And let me tell you, it tastes as good as it looks! 


Ingredients:
2 cups all purpose flour
1 1/2 tsp. baking powder
1/2 tsp. baking powder
1/4 tsp. fresh grated cinnamon
1/8 tsp. fresh ground nutmeg
1/4 tsp. salt
2 eggs, beaten
5 over-ripe medium sized bananas, about 1 1/2- 2 cups mashed
1 cup granulated sugar
1/2 cup vegetable oil
1/2 cup shredded coconut
1/2 pkg. Philadelphia Cream Cheese room temperature
1/2 cup milk
1/2 cup confectioners sugar
1 1/2 tsp vanilla extract
2 tbsp. finely ground toasted pecans to garnish

Directions:
1. Grease bundt pan with shortening or butter. Lightly flour and remove excess. Set aside.

2. Preheat oven to 350 degrees.

3. In a large mixing bowl, sift together flour, baking powder, baking soda, cinnamon, nutmeg and salt. Set aside.

4. In medium sized mixing bowl, mix eggs. Then add smashed bananas, sugar, and oil. Thoroughly mix all wet ingredients. (A potato masher works well for this process...)

5. Add wet ingredients to dry ingredients. Mix well by hand. Batter will be lumpy.

6. Finally add coconut to batter and combine.

7. Pour into bundt pan and place in oven.

8. Cook for 45-50 minutes or until toothpick comes out clean.

9. Remove from oven and let cook in pan on wire rack for ten minutes.

10. Then remove from pan and continue to cool on wire rack until room temperature.

11. In the meantime make the glaze. In a medium mixing bowl, combine cream cheese, milk, confectioners sugar, and vanilla. Whip ingredients together using a hand mixer. 

12. Pour glaze into measuring cup with a spout to easily drizzle over cake once cooled to room temperature. Now top with pecans and serve.


Sunday, September 11, 2011

Strawberry Fillo Tartlettes

I absolutely love taking a large dessert, breaking it down and creating individual, bite-sized desserts. These Strawberry Tartlettes are a perfect way to take a traditional Strawberry Pie and control the portions, as well as, create a visually beautiful and decandent plating. This dessert takes very little time and effort, but it will leave everyone thinking you spent hours slaving away in the kitchen. It is sweet, refreshing and a simple way to embrace summer.


Ingredients:
1 pint organic strawberries, hulled and sliced 
3 tbsp. cornstarch
1 cup granulated sugar
1 cup water
1/4 cup strawberry jello
Athens fillo dough shells
Dark chocolate, shaved for garnish
Homemade whipped cream for garnish (recipe on blog)


Directions:
1. In medium saucepan, combine cornstarch, sugar and water on medium heat. 

2. Stir frequently, watch to make sure it does not burn. Bring to a boil and continue to simmer. As it reaches desired consistency, the mixture will start to become clear.

3. When mixture thickens, add jello mix. Remember jello mix tends to thin out your original mixture, so make sure it is desired consistency before adding it. Then, stir until thoroughly combined.

4. Remove saucepan from heat and allow to cool to room temperature.

5. Place into gallon baggie. (You will use this later to pipe mixture into fillo dough shells and garnish plate.)

6. Hull and slice strawberries thin so they are able to easily fit into fillo shells. 

7. Now place strawberries in fillo shells which have been set out on a baking sheet.

8. Pipe in enough jello mixture to cover strawberries in the shells. It will help them to keep, as well as, to retain color longer. 

9. Place tartlettes into the fridge to set. Leave for a minimum of one hour before serving.

10. You can use remaining mixture to garnish serving plate, as well as, using homemade whipped cream and chocolate shavings to complete the garnish.


Monday, July 11, 2011

The Blueberry Pie

Fruit is definitely a go-to item for summertime desserts and this Blueberry Pie recipe is no exception. Blueberries are delicious, rich in antioxidants, visually appealing, and an ideal candidate for a summertime dessert. 


After several versions of Blueberry Pie, it was apparent the following version was the clear winner. The result was simple perfection. The crust itself is simple, yet buttery, rich and flaky. It not only pairs, but also compliments, the blueberry filling. This filling is very well balanced. Upon initial bite there is an intense sweetness, but the depth of flavor increases as you begin to chew. Upon biting into the berries, a tart juice is quickly released leaving behind the perfect balance of flavors in your mouth.

The only thing left to do is top your generous slice of Blueberry Pie with vanilla gelato and fresh whipped cream.  And most importantly, enjoy!

(The following is adapted from several recipes including those from food network magazine.)

Ingredients:
crust:
1 stick cold unsalted butter
3 ounces cold cream cheese, prefer Philadelphia Cream Cheese
1 3/4 cups, all-purpose flour
Pinch of Kosher salt

Filling:
6 cups fresh blueberries
1 cup sugar
3 tablespoons cornstarch
1 teaspoon lemon juice
1/2 teaspoon lemon zest


Directions:
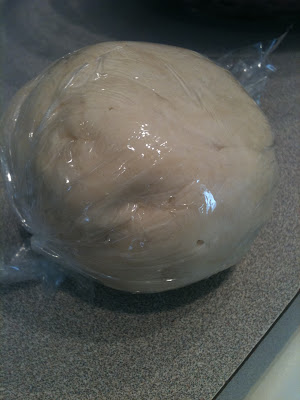
1. Make the crust. In a food processor combine cold butter and cream cheese until texture is smooth. Now add remaining ingredients to mixture. Pulse in food processor until mixture comes together in a ball. Remove the dough and wrap in plastic wrap. Place in fridge for a minimum of 1 hour.


2. While dough chills prepare the filling. In a large bowl placed cleaned blueberries, sugar, cornstarch, lemon juice, and lemon zest. Mix and coarsely mash. Let stand for 20 minutes. (Thoroughly mix again before adding to crust.)


3. Preheat over to 350 degrees. On a floured surface roll out dough to fit into a 9" tart pan with removable bottom or a springform pan. Fit it into pan and trim excess dough. Return the pie crust back to the fridge for 20 minutes. After 20 minutes, line the crust with foil and fill with pie weights or dried beans. Cook for approximately 18 minutes or until golden brown. Remove from oven and remove the weights and foil from the top of the crust. Cool crust on a wire rack.


4. Now increase the oven temperature to 375 degrees. Spoon the filling into the crust and return to the oven. Bake pie in center of oven for approximately an hour, or until filling is bubbly and crust is golden brown. Remove and cool on wire rack to room temperature before serving.